
introduction
 Making espresso at home can look complicated at first.
There is the machine, grinder, coffee beans, portafilter, tamper, scale, grind size, dose, extraction time—and then there are all the different numbers people tell you to remember.
The good news is that you don’t need to understand everything before pulling your first shot.
You just need a simple starting point, consistent preparation, and a way to taste and adjust your espresso.
This guide will show you how to make espresso at home step by step, from choosing the right equipment and grinding your coffee to pulling the shot, dialing in the grind, and fixing common problems.
Let’s start with the basics.
What Is Espresso?
Espresso is a concentrated coffee made by forcing hot water through finely ground coffee under pressure.
Unlike filter coffee, espresso is brewed quickly and requires a fine grind, controlled water temperature, and properly prepared coffee grounds.
The result is a small, concentrated drink with a rich aroma, body, and—when properly extracted—a balanced combination of sweetness, acidity, and bitterness.
One important thing to understand as a beginner is that espresso does not automatically taste good just because the machine is expensive.
Your grinder, dose , yield ,water temperature , water quality ,coffee freshness, coffee roast profiles, puck preparation, extraction, and adjustments all matter.
What Do You Need to Make Espresso?
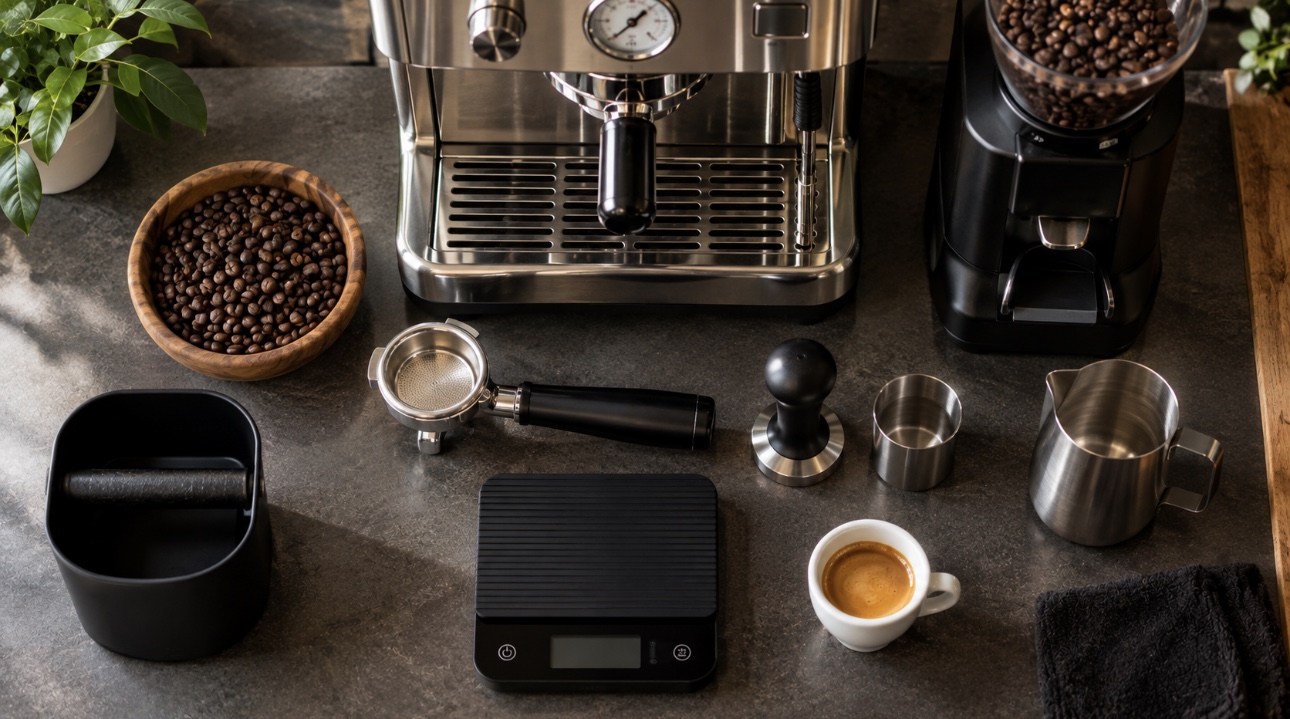 You don’t need a huge collection of coffee gadgets to get started.
A basic home espresso setup can be surprisingly simple. The most useful equipment is the equipment that helps you prepare the coffee consistently and repeat the same process from shot to shot. Current home-espresso guides similarly emphasize the machine, grinder, scale, tamper, and basic puck-preparation tools as the core setup.
1. Espresso Machine
The espresso machine provides the pressure and controlled hot water needed to brew espresso.
If you’re buying a machine for home use, look for one that allows you to control the brewing process rather than focusing only on the machine’s appearance or number of features.
2. Espresso Grinder
A good burr grinder is one of the most important pieces of espresso equipment.
Espresso requires a fine and consistent grind, and small changes in grind size can have a noticeable effect on how quickly water flows through the coffee.
If you have to choose where to spend more of your budget, don’t overlook the grinder.
3. Fresh Coffee Beans
Good espresso starts with good coffee.
Choose beans that are suitable for espresso and store them properly in an airtight container away from heat, moisture, and direct sunlight.
Most importantly, grind the beans shortly before brewing rather than relying on pre-ground coffee.
4. Digital Scale
A digital coffee scale is one of the most useful tools for a beginner.
Instead of guessing how much coffee you are using or how much espresso is going into your cup, you can measure both.
A scale with 0.1 g precision and a timer is especially useful for espresso because it makes your brewing process much easier to repeat.
5. Tamper
A tamper compresses the coffee grounds evenly inside the portafilter.
Choose a tamper that properly fits your basket. The goal isn’t simply to press as hard as possible—the important part is creating a level and evenly compressed coffee bed.
6. Tamper Mat
A tamper mat is a small but practical addition to your espresso setup.
It provides a stable, non-slip surface while tamping and helps protect your countertop and portafilter.
You don’t need an expensive one. A simple, durable mat is enough.
7. WDT Tool
A WDT (Weiss Distribution Technique) tool uses thin needles to break up clumps and distribute coffee grounds more evenly before tamping.
This can help with more consistent puck preparation, particularly when your grinder produces clumps.
8. Knock Box
After brewing, you need somewhere to dispose of the used coffee puck.
A knock box makes this quick and convenient.
Instead of hitting the portafilter against your bin or trying to remove the puck with your fingers, you simply knock the used coffee into the box.
Beginner Equipment Checklist
Essential:
- Espresso machine
- Espresso grinder
- Fresh coffee beans
- Digital coffee scale
- tamper
Very useful additions:
- Tamper mat
- WDT tool
- Knock box
You can add other accessories later. You don’t need to buy every espresso gadget before you learn the basics.
A Simple Espresso Recipe for Beginners
Before you start changing things, it helps to have one simple recipe as your starting point.
Beginner Espresso Starting Point
| Variable | Starting Point |
|---|---|
| Coffee dose | 18 g |
| Espresso yield | 36 g |
| Brew ratio | 1:2 |
| Extraction time | About 25–30 seconds |
| Water temperature | Around 90–96°C |
| Grind | Fine, adjusted to control flow |
This is a starting recipe, not a universal rule. Basket size, coffee, roast level, grinder, and your preferred taste can all change the ideal recipe. Most beginner barista guides suggest using a roughly 1:2 ratio and a 25-30 second extraction window as a starting point, while emphasizing that taste matters more than following exact numbers.
The important thing is to start consistently before making adjustments.
How to Make Espresso Step by Step
Now let’s get into the actual process.
Step 1: Preheat Your Espresso Machine
Turn on your espresso machine and give it enough time to reach a stable brewing temperature.
Don’t focus only on whether the machine says it is ready. The group head and portafilter should also be properly warmed.
If your machine allows it, run a short amount of water through the group head before brewing.
A cold portafilter can affect the temperature of the water reaching your coffee and make your first shot less consistent.
Step 2: Grind Your Coffee Fresh
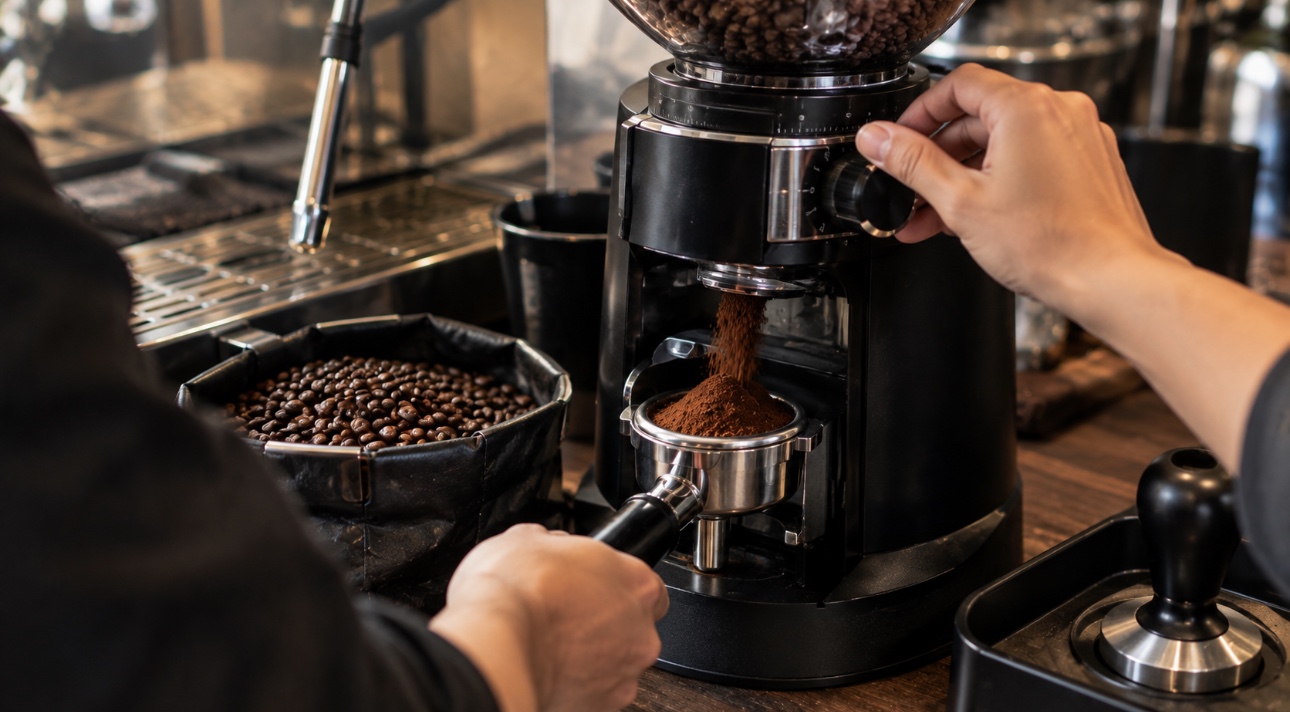 Grind your coffee immediately before brewing.
Start with a fine espresso grind, then adjust it based on how the shot flows and tastes.
The exact grinder setting cannot be copied from another grinder because different grinders use different numbering systems.
That’s why you’ll eventually need to dial in your own grinder.
step 3: Prep
Clean and dry the portafilter, distribute the grounds evenly in the basket, and level them out.
Step 4: Coffee Dose
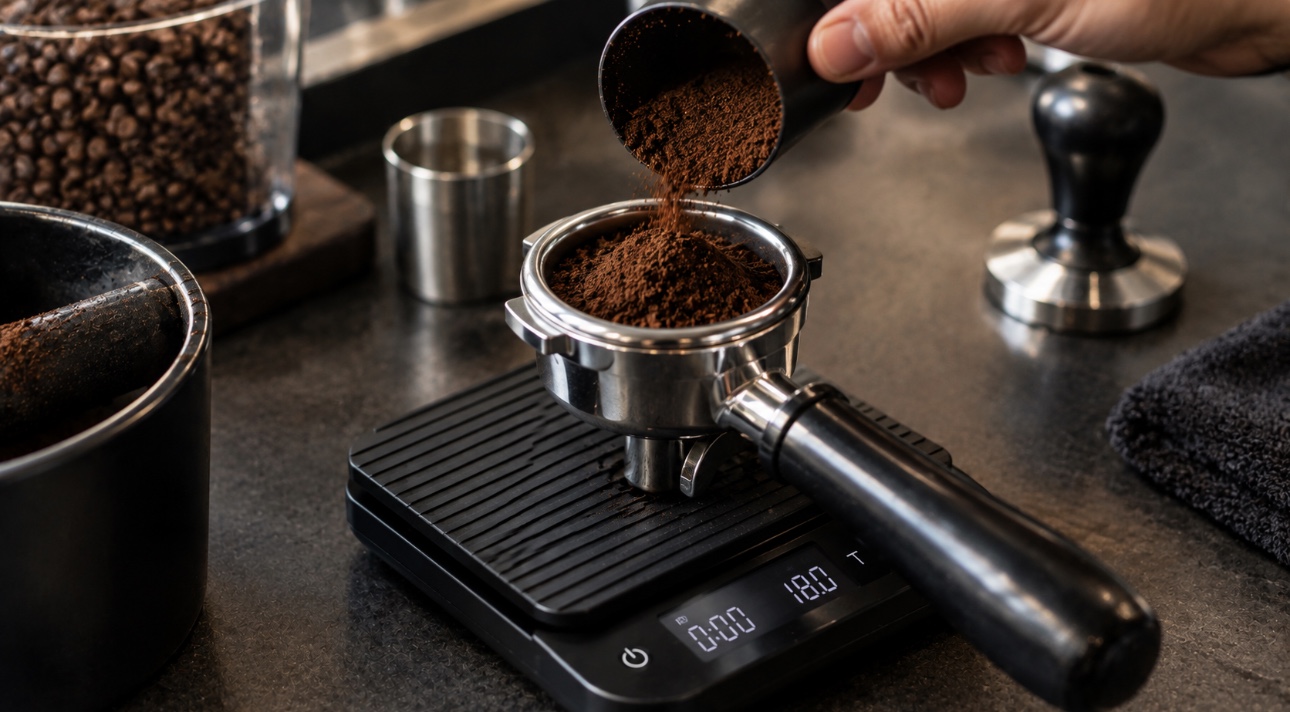 Place your portafilter or dosing container on your digital scale and measure your coffee.
Avoid relying on the grinder’s timer alone if you want consistent results.
A small difference in dose can change the resistance of the coffee bed and affect the extraction.
Step 5: Distribute the Coffee Grounds
After grinding, look at the coffee in your basket.
If the grounds are piled more heavily on one side, don’t tamp immediately.
First, distribute the coffee evenly.
You can gently level the grounds or use a WDT tool to break up clumps and improve distribution.
The goal is simple:
Create an even coffee bed before tamping.
Step 6: Tamp the Coffee Evenly
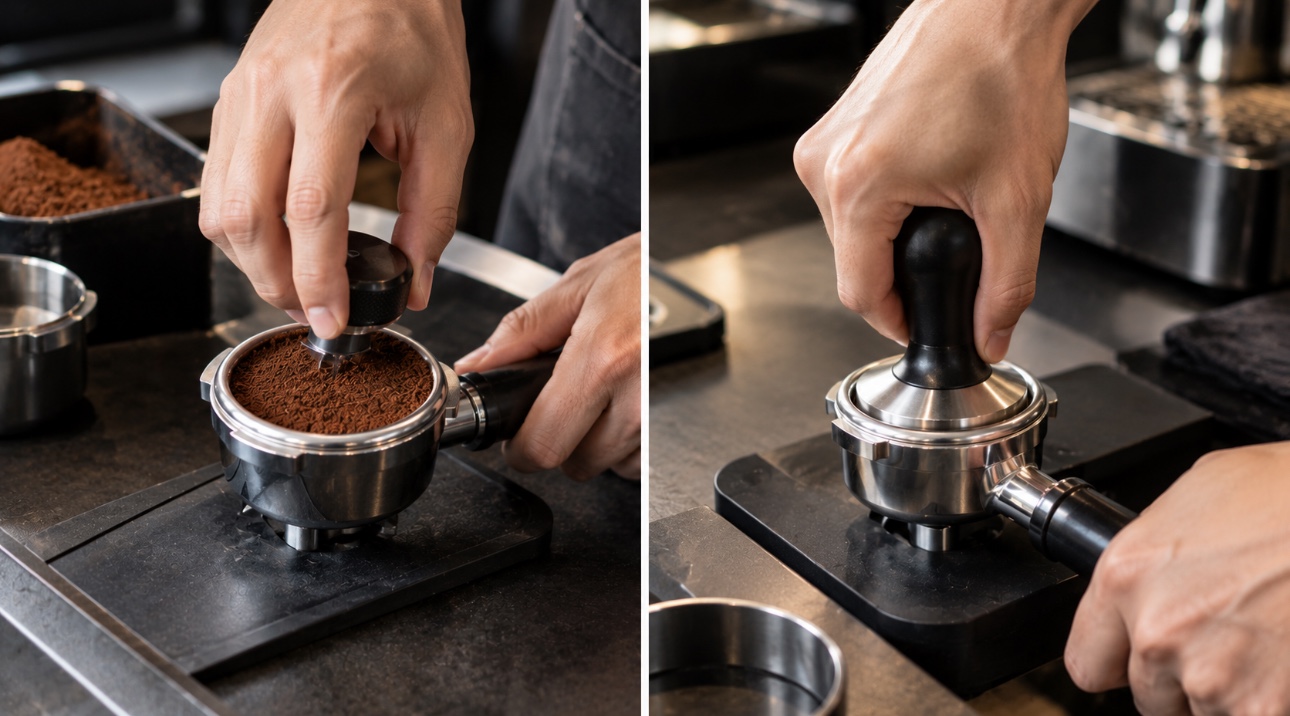 Place the tamper level on the coffee bed and press straight down.
You don’t need to crush the coffee with excessive force.
What matters most is that the puck is flat, even, and consistently tamped.
A crooked tamp can create areas where water finds an easier path through the coffee, which can contribute to uneven extraction or channeling.
step 7: Flush
Run a small amount of hot water through the machine’s group head to clean the screen and stabilize temperature.
Step 8: Lock the Portafilter Into the Machine
Clean any loose coffee from the rim of the basket.
Then lock the portafilter firmly into the group head.
Try not to knock or disturb the coffee puck after tamping.
Step 9: Start the Espresso Shot
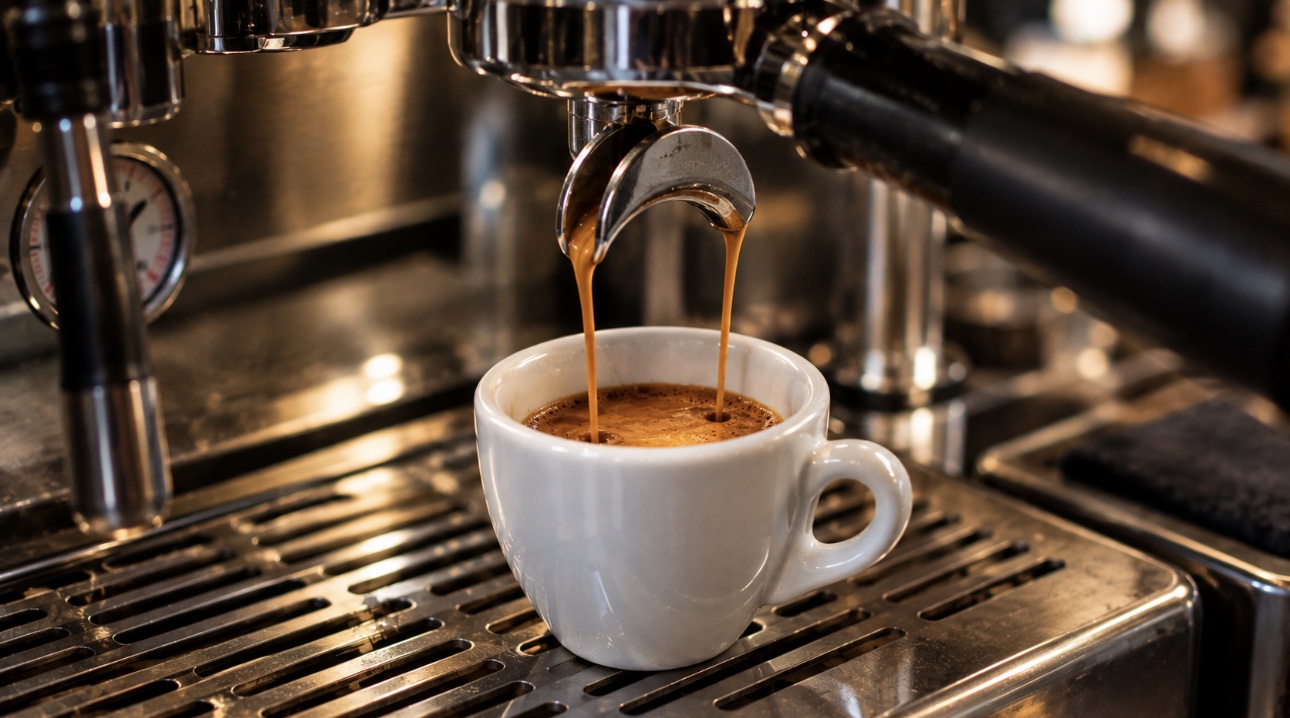 Place your cup and scale underneath the portafilter.
Start the extraction and watch what happens.
Don’t worry if your first few shots don’t look perfect.
You’re learning how your coffee, grinder, machine, and preparation work together.
Step 10: Watch the Extraction
As the shot develops, pay attention to the flow.
You want a reasonably consistent stream rather than an uncontrolled gush, severe spraying, or an extraction that barely moves.
The appearance of the espresso can give you clues, but don’t judge the shot by appearance alone.
Taste is the final judge.
Step 11: Stop the Shot at Your Target Yield
Stop the extraction when you reach your chosen target output.
Then remove the cup from the scale and taste the espresso once it has cooled slightly.
Ask yourself:
- Is it sweet?
- Is it balanced?
- Is it too sour?
- Is it too bitter?
- Does it feel thin?
- Does it feel dry or harsh?
This is where espresso becomes a skill rather than simply following a recipe.
How to Dial In Espresso
Getting a good espresso is usually not about finding one magical recipe.
It’s about making small adjustments until the coffee tastes balanced.
The easiest approach for a beginner is to change one major variable at a time. Current espresso guides consistently recommend using grind size as the first adjustment while keeping the other variables relatively stable.
If Your Espresso Runs Too Fast
If the shot flows much faster than expected and tastes thin, sharp, or sour, the grind may be too coarse.
Try this:
Grind slightly finer.
A finer grind increases extraction and usually slows the flow.
If Your Espresso Runs Too Slowly
If the espresso barely drips or takes much longer than expected and tastes harsh or dry, the grind may be too fine.
Try this:
Grind slightly coarser.
This allows water to move through the coffee more easily and reduce extraction time.
How to Choose the Right Espresso Grind Size
Espresso generally requires a fine grind, but there is no single grinder number that works for every machine.
Your grinder, coffee beans, roast level, basket, and recipe all affect the result.
Instead of asking:
“What exact grinder setting should I use?”
A better question is:
“Is my grind producing the flow and taste I want?”
Start with a fine setting and make small adjustments.
A simple rule:
Fast + sour → try finer
Slow + bitter/dry → try coarser
But remember that taste can be more complicated than those two rules.
A dark roast can taste bitter even when the extraction isn’t excessive, while a lighter roast can naturally have more acidity. So use time and flow as clues, not as the final answer.
What Is Espresso Brew Ratio?
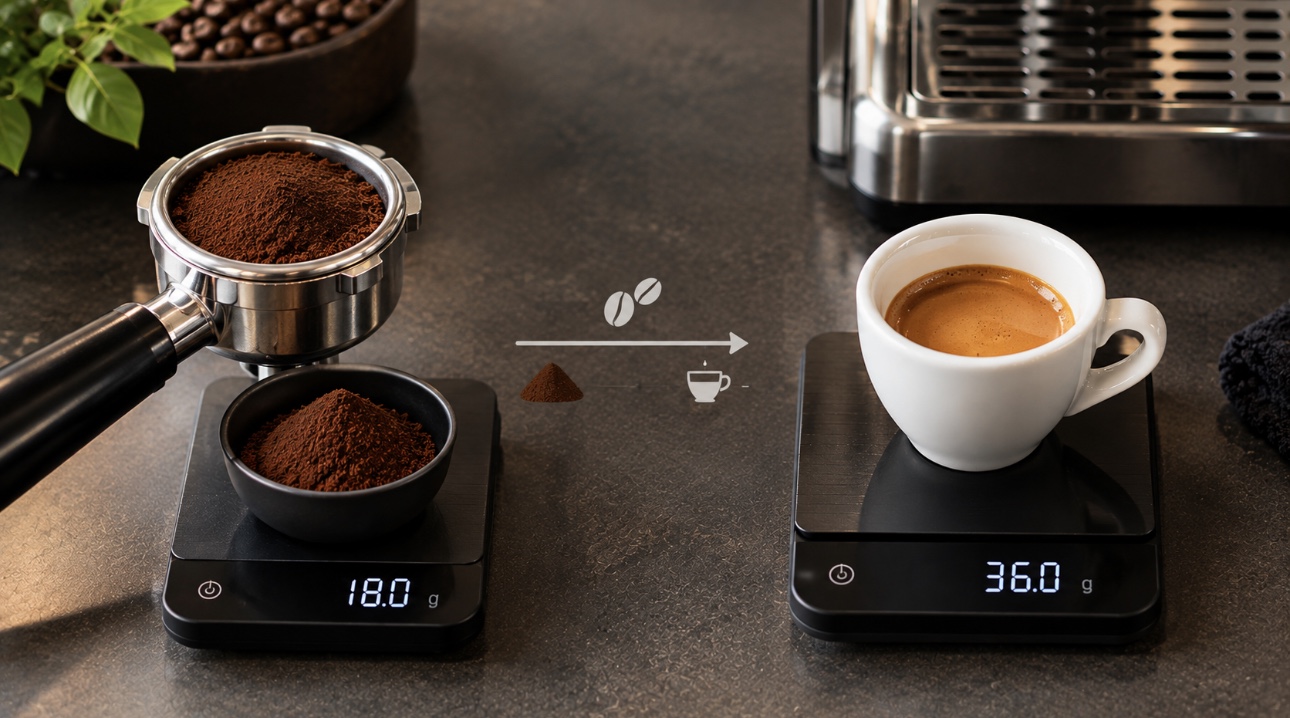 You don’t need to create a separate long section explaining the ratio and then repeat it throughout the article. Here’s the simple version:
Brew ratio is the relationship between the amount of dry coffee you put into the basket and the amount of espresso you get out.
For example, a 1:2 ratio means the output is approximately twice the coffee dose.
So if you start with 18 g of coffee, a 1:2 ratio would give you about 36 g of espresso.
Think of the ratio as a starting point for controlling concentration, not a rule that every espresso must follow.
Once you’re comfortable, you can experiment with shorter or longer ratios depending on the coffee and the flavor you want.
How to Get Better Espresso Extraction
Once you understand the basic workflow, focus on consistency.
Grind Fresh
Grinding immediately before brewing helps you control the coffee more precisely.
Weigh Your Coffee
Don’t rely on scoops or guesswork.
Measure your dose so you can reproduce a good shot.
Distribute the Grounds Evenly
Uneven grounds can create weak areas in the puck where water flows too easily.
Take a few seconds to prepare the coffee properly before tamping.
Tamp Level
You don’t need extreme force.
Focus on creating a flat and even puck.
Keep Your Workflow Consistent
If you change the grind, dose, tamping technique, and yield all at once, you won’t know what actually improved the shot.
Change one thing, brew again, and taste the result.
That simple habit will make dialing in much easier.
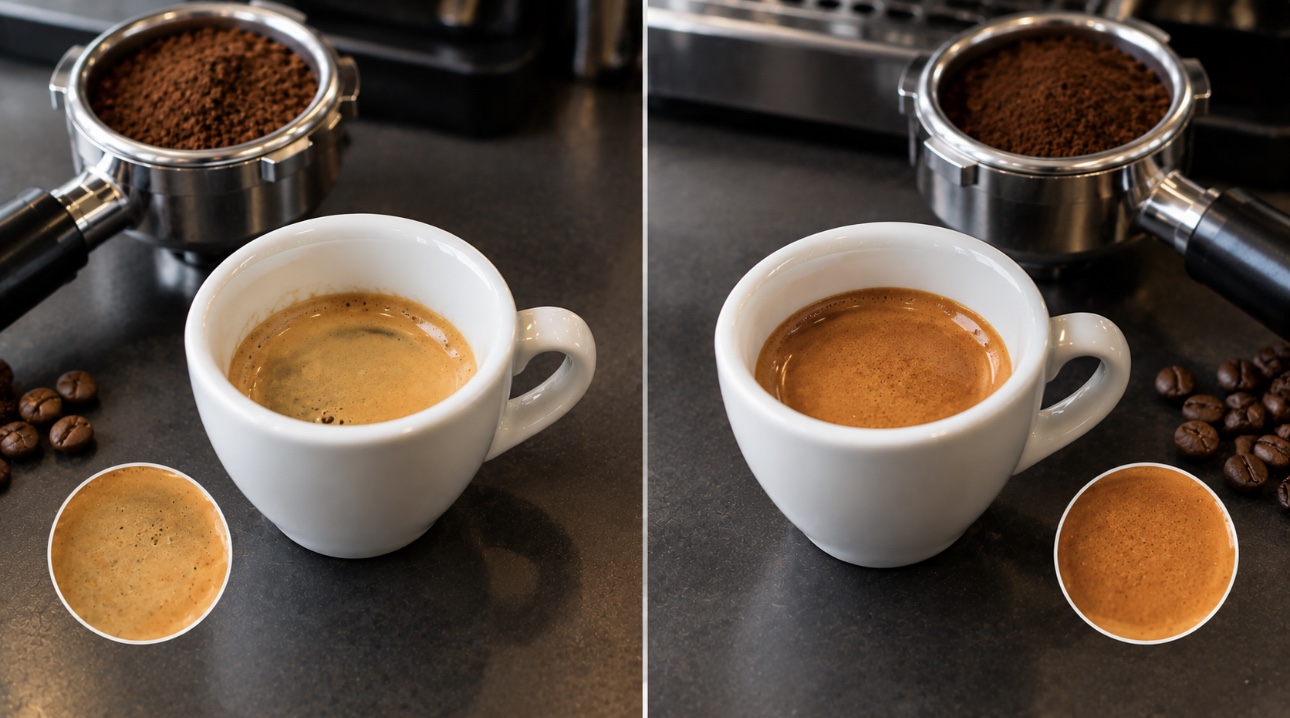
What Does a Good Espresso Shot Look Like?
A good espresso shot doesn’t have to look exactly like the pictures you see online.
You may notice:
- A steady flow
- A rich aroma
- A pleasant crema
- Good body
- Balanced sweetness and acidity
- A clean or pleasant finish
But don’t become obsessed with crema.
More crema does not automatically mean better espresso.
Crema can be influenced by bean freshness, roast style, blend composition, and extraction conditions. What matters most is how the espresso actually tastes.
Common Espresso Problems and How to Fix Them
| Problem | Possible Cause | First Thing to Try |
|---|---|---|
| Shot runs very fast | Grind too coarse or uneven puck | Grind finer and improve distribution |
| Shot runs very slowly | Grind too fine or excessive dose | Grind coarser and check basket dose |
| Espresso tastes sour | Under-extraction or naturally high acidity | Check flow; if fast, grind finer |
| Espresso tastes bitter | Over-extraction or dark-roast character | If slow, grind coarser |
| Espresso tastes thin | Fast flow, weak extraction, or long ratio | Check grind and preparation |
| Espresso tastes dry/harsh | Over-extraction or uneven extraction | Check grind and puck preparation |
| Shot changes every time | Inconsistent dose or preparation | Weigh everything and standardize your workflow |
| Coffee sprays from the portafilter | Possible channeling | Improve distribution and tamping |
These are starting points rather than absolute rules. Coffee can taste sour or bitter for several different reasons, so always combine taste + flow + preparation when diagnosing a shot.
What Is Channeling in Espresso?
Channeling happens when water finds a weak path through the coffee puck instead of flowing evenly through the grounds.
Imagine pouring water through a pile of sand.
If one area has a small gap, water will naturally find that easier path.
The same basic idea can happen inside an espresso puck.
Channeling may produce:
- Spraying
- Uneven flow
- Thin espresso
- Sour and bitter flavors together
- Different results from shot to shot
How can you reduce channeling?
Focus on:
- Even distribution
- Breaking up clumps
- Level tamping
- Consistent dosing
- Keeping the basket clean
This is one reason good puck preparation matters so much.
Common Mistakes Beginners Make
1. Using the Wrong Grinder
A cheap grinder that produces a very inconsistent grind can make espresso much harder to dial in.
2. Guessing the Dose
If you don’t weigh your coffee, it becomes difficult to understand why one shot worked and another didn’t.
3. Changing Too Many Things at Once
This is one of the biggest beginner mistakes.
If you change the grind, dose, temperature, and yield simultaneously, you lose the ability to understand what caused the change.
4. Tamping Unevenly
A level puck is more important than trying to tamp with extreme force.
5. Ignoring Distribution
Tamping cannot completely fix badly distributed grounds.
Prepare the coffee evenly first.
6. Chasing the Numbers Instead of the Taste
A shot that takes exactly 28 seconds is not automatically delicious.
Use your recipe as a guide.
Then taste.
7. Buying Too Many Gadgets Too Early
You don’t need every espresso accessory available online.
Get your machine, grinder, scale, tamper, and basic preparation tools right first.
Then improve your setup as your skills develop.
How to Clean Your Espresso Equipment
Good espresso isn’t only about brewing.
Clean equipment also helps maintain consistency and keeps old coffee oils from affecting the flavor.
After Every Shot
Knock Out the Coffee Puck
Use your knock box to remove the spent coffee from the portafilter.
Rinse the Portafilter
Flush away remaining coffee grounds.
Rinse the Basket
Make sure old coffee isn’t stuck around the holes.
Flush the Group Head
Run a short amount of water through the group head according to your machine’s instructions.
Wipe the Steam Wand
If you use the steam wand, wipe it immediately after steaming and purge it according to the machine manufacturer’s instructions.
Regularly follow your machine’s deeper cleaning and backflushing instructions as well.
A Simple Espresso Workflow for Beginners
Once you understand everything above, your daily workflow can be very simple:
1. Warm up the machine
↓
2. Weigh your coffee
↓
3. Grind fresh
↓
4. Distribute the grounds
↓
5. Use WDT
↓
6. Tamp level
↓
7. Lock in the portafilter
↓
8. Start the shot
↓
9. Weigh the output
↓
10. Taste
↓
11. Make one small adjustment if necessary
That’s it.
You don’t need to make espresso complicated.
Consistency is what makes the process easier.
Espresso Tips for Beginners
Tip 1: Start With One Coffee
Don’t switch between five different bags of beans while learning.
Use one coffee and learn how it behaves.
Tip 2: Keep Notes
Write down:
- Coffee
- Grinder setting
- Dose
- Yield
- Time
- Taste
This makes your progress much easier to track.
Tip 3: Change One Thing at a Time
This is probably the most useful espresso lesson for a beginner.
Make one adjustment, pull another shot, and compare.
Tip 4: Don’t Be Afraid of Bad Shots
Your first espresso may be too fast.
The next one may be too slow.
That’s normal.
Dialing in is part of learning espresso.
Tip 5: Taste Before You Adjust
 Don’t automatically change the grind just because the shot took a few seconds longer or shorter than expected.
Taste the espresso first.
Frequently Asked Questions
How much coffee do I need to make espresso?
It depends on your basket size and recipe. A modern double basket commonly works in the mid-to-high teens of grams, with 18 g being a useful starting point for many setups.
The important thing is to match the dose to your basket rather than forcing the same dose into every portafilter.
What grind size is best for espresso?
Espresso generally requires a fine grind, but the exact setting depends on your grinder and coffee.
Start fine and adjust according to the flow and taste.
How long should an espresso shot take?
A common starting range is around 25–30 seconds, although many modern guides use a broader range around 25–35 seconds.
Treat time as a diagnostic tool rather than a strict rule.
Why does my espresso taste sour?
A sour espresso can be a sign of under-extraction, especially when the shot runs quickly.
Try grinding slightly finer and compare the result.
However, some coffees naturally have bright acidity, so sourness isn’t always a problem.
Why does my espresso taste bitter?
Bitterness can come from over-extraction, but roast style also matters.
If your shot is very slow and tastes harsh or dry, try grinding slightly coarser.
Why is my espresso running too fast?
The grind may be too coarse, the puck may be unevenly prepared, or your dose may not suit the basket.
Start by making the grind slightly finer and checking your puck preparation.
Why is my espresso running too slowly?
The grind may be too fine, or the basket may be overdosed.
Try grinding slightly coarser and check that you’re using an appropriate dose for the basket.
Do I need a WDT tool to make espresso?
No.
You can make espresso without one. However, a WDT tool can be useful for breaking up clumps and improving distribution, especially if your grinder produces uneven or clumpy grounds.
Do I need a digital scale for espresso?
You can make espresso without a scale, but a digital scale makes the process much easier to repeat.
It allows you to measure both the coffee going into the basket and the espresso coming out.
Do I need an expensive espresso machine?
No.
A more expensive machine doesn’t automatically produce better espresso.
A capable grinder, suitable coffee, consistent preparation, and good dialing-in technique can make a major difference.
Final Thoughts
 Learning how to make espresso at home doesn’t have to be complicated.
Start with the right basic equipment, use a simple recipe, prepare your coffee carefully, and learn to taste what is happening in the cup.
Don’t worry about getting everything perfect on your first attempt.
Your first shot might be too fast.
Your second might be too slow.
Then, after a few small adjustments, you’ll start to understand the relationship between your grinder, coffee, preparation, and extraction.
And that’s when espresso becomes much more enjoyable.
The goal isn’t to follow a recipe forever.
The goal is to understand the recipe well enough that you can adjust it for different coffees and consistently make espresso that tastes good to you.